Phone:
(701)814-6992
Physical address:
6296 Donnelly Plaza
Ratkeville, Bahamas.

Phone:
(701)814-6992
Physical address:
6296 Donnelly Plaza
Ratkeville, Bahamas.

Bathroom renovations have some of the best ROI in the industry, but only if you pick the right upgrades - here's what actually pays back.
Most bathroom upgrades lose money at resale, but seven specific projects consistently return 60-70% of their cost when homeowners sell. The difference between a smart bathroom investment and an expensive mistake often comes down to knowing which updates buyers actually notice and which ones drain your budget without adding real value.
Understanding bathroom renovations with the highest ROI means separating contractor-level work from DIY-safe projects, knowing real cost breakdowns, and recognizing when to stop before over-improving your space. This guide breaks down exactly which bathroom upgrades deliver the best returns in 2026, what you can tackle yourself, and where you need to call a licensed professional.
Table of Contents
Return on investment for bathroom projects varies dramatically based on scope, quality, and your home’s market. A $25,000 master bath remodel in a $200,000 home represents over-improvement, while the same investment in a $500,000 property makes financial sense.
Cost vs. Value Breakdown:
| Project Type | Average Cost | Resale Value | ROI % |
|---|---|---|---|
| Minor Remodel | $5,000-$15,000 | $8,000-$10,000 | 60-67% |
| Mid-Range Remodel | $15,000-$30,000 | $18,000-$20,000 | 60-65% |
| Upscale Remodel | $50,000-$75,000 | $27,000-$40,000 | 53-58% |
| Fixture Refresh | $500-$2,000 | $800-$1,500 | 75-80% |
The sweet spot for bathroom renovations with the highest ROI sits in the minor-to-mid-range category. These projects update visible elements without moving plumbing or expanding square footage.
Before You Start:
Check your local building department requirements. Most cosmetic updates don’t need permits, but any work involving plumbing changes, electrical circuits, or structural modifications requires permits and inspections. Skipping permits creates liability issues and problems during home sales.
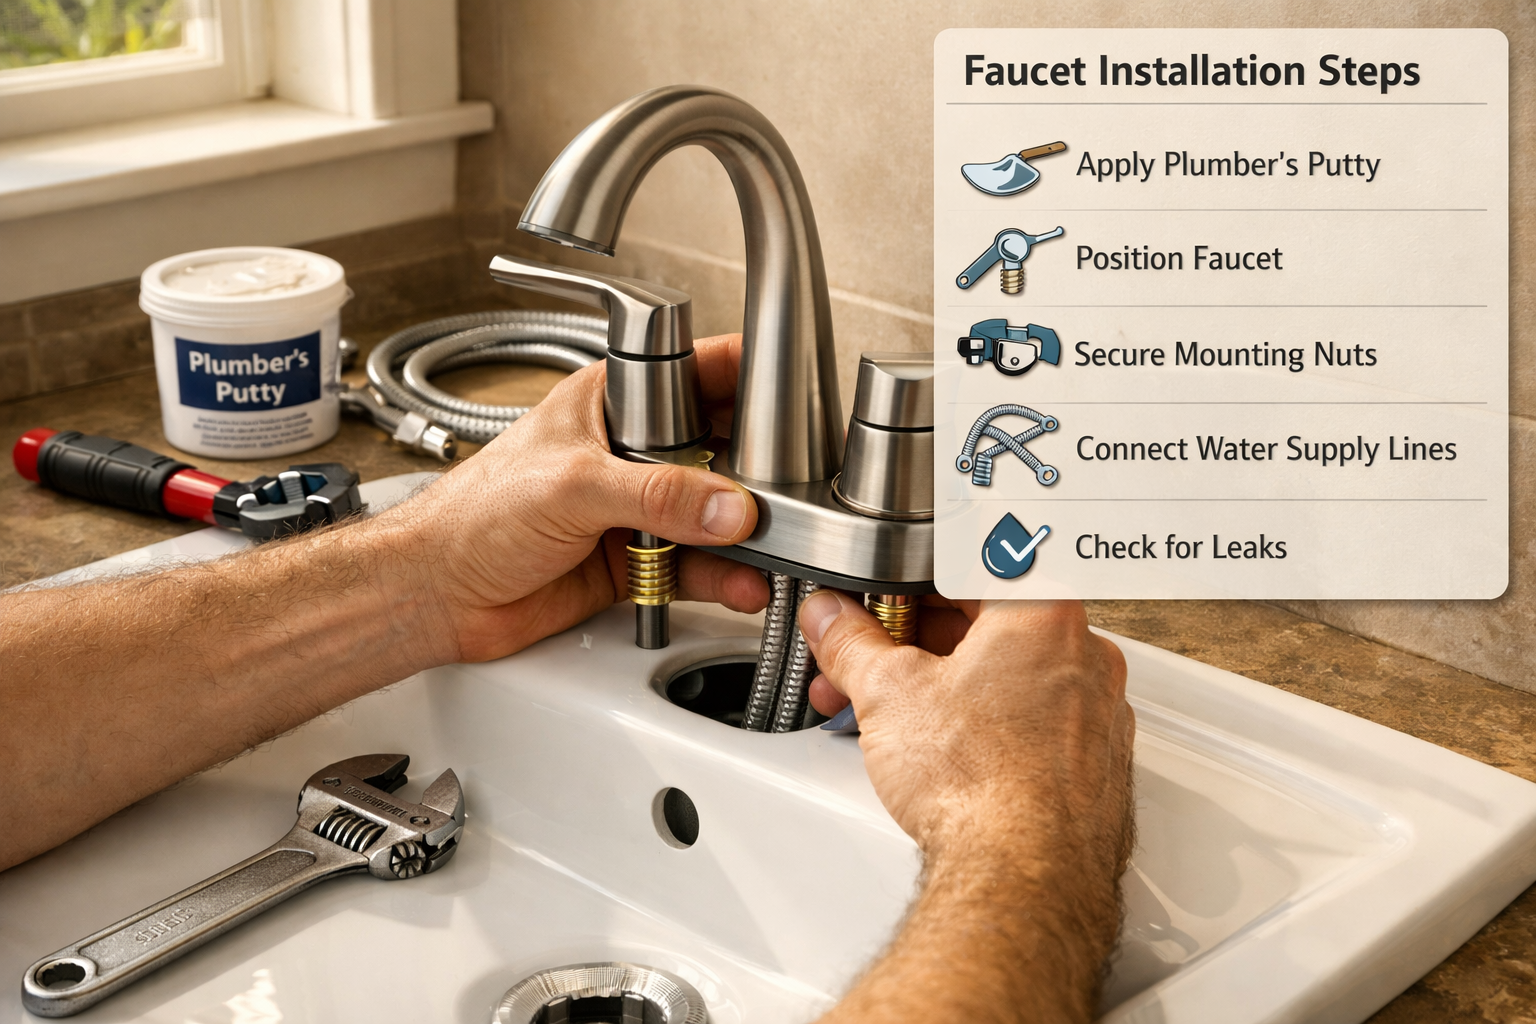
Swapping outdated faucets delivers immediate visual impact for minimal cost. This project ranks among the highest-return bathroom upgrades because buyers notice fixtures immediately.
DIY-Safe Scope:
Direct replacement of existing faucets, showerheads, and towel bars without changing plumbing locations. If supply lines connect in the same spots and drain configurations match, this stays DIY-safe.
Tool List:
Cost Breakdown:
Step-by-Step Process:
Common Mistakes:
Over-tightening connections causes cracked fixtures and stripped threads. Hand-tight plus one quarter-turn with a wrench provides adequate seal. Cross-threading supply lines creates leaks that appear days later, so thread carefully by hand first.
Licensed Professional Required:
Call a plumber if you need to relocate supply lines, change drain positions, or discover corroded pipes during removal. Water damage from DIY plumbing mistakes costs far more than professional installation.
For detailed faucet replacement instructions, see our guide on how to replace a leaky kitchen or bathroom tap.
Paint transforms bathroom appearance for $50-$150 in materials. This project delivers 100%+ ROI when done properly because buyers perceive freshly painted spaces as well-maintained.
DIY-Safe Scope:
Painting walls, ceilings, and trim in existing bathrooms. Proper surface prep and moisture-resistant paint prevent peeling and mildew.
Tool List:
Cost Breakdown:
Step-by-Step Process:
Color Selection for Maximum ROI:
Neutral colors appeal to the broadest buyer pool. Soft grays, warm whites, and light beiges test best in bathroom spaces. Avoid bold colors, trendy shades, or personal preferences that limit appeal.
Common Mistakes:
Skipping primer on bathroom walls causes paint to peel within months due to moisture. Using flat or eggshell paint instead of satin or semi-gloss finish creates surfaces that can’t withstand humidity and cleaning.
Learn proper surface preparation techniques in our guide to prepping surfaces before painting.
Cabinet hardware, towel bars, toilet paper holders, and light switch plates cost $50-$200 to update but dramatically modernize bathroom appearance.
DIY-Safe Scope:
Replacing existing hardware using current mounting holes. Installing new pieces where no backing exists requires wall anchors rated for bathroom humidity.
Tool List:
Cost Breakdown:
Installation Tips:
Match finish across all hardware for cohesive appearance. Brushed nickel, matte black, and chrome remain popular choices with broad appeal. Measure twice before drilling new holes, as mistakes in tile or drywall require patching.
Common Mistakes:
Installing towel bars without hitting studs or using proper anchors leads to failures when weight is applied. Bathroom humidity weakens drywall, so use metal toggle bolts or molly anchors rated for 50+ pounds.
Dingy grout makes entire bathrooms look dirty regardless of actual cleanliness. Deep cleaning and resealing grout costs $30-$80 and takes 3-4 hours.
DIY-Safe Scope:
Cleaning, whitening, and sealing existing grout. This project doesn’t involve removing or replacing grout, which requires different tools and skills.
Tool List:
Cost Breakdown:
Step-by-Step Process:
Common Mistakes:
Applying sealer to damp grout traps moisture and causes mildew. Grout must be completely dry before sealing. Using acidic cleaners on natural stone tile damages surfaces, so check product compatibility.
For more details on grout selection and maintenance, check our guide to choosing the perfect grout color.
Replacing dated light fixtures improves functionality and appearance. Modern LED fixtures reduce energy costs while providing better illumination.
DIY-Safe Scope:
Direct replacement of existing light fixtures using current electrical boxes and switches. No circuit changes, no new wiring runs, no panel work.
Tool List:
Cost Breakdown:
Safety Requirements:
Turn off power at the circuit breaker, not just the wall switch. Test wires with voltage tester before touching. If you’re uncomfortable working with electrical connections, this crosses into licensed professional territory.
Step-by-Step Process:
Licensed Professional Required:
Call an electrician if you need to install new circuits, move switch locations, or add GFCI protection. Bathroom electrical work involves specific code requirements for moisture protection.
Our guide to replacing light fixtures safely covers this project in detail.
A running toilet wastes 200+ gallons daily and signals poor maintenance to buyers. Fixing toilet issues costs $15-$50 for parts and takes 30-60 minutes.
DIY-Safe Scope:
Replacing internal tank components (flapper, fill valve, flush valve) or swapping an entire toilet using existing floor flange and water supply location.
Tool List:
Cost Breakdown for Repairs:
Cost Breakdown for Replacement:
Common Mistakes:
Over-tightening toilet bolts cracks porcelain. Tighten evenly in small increments until toilet doesn’t rock. Using multiple wax rings creates leaks; one properly compressed ring seals correctly.
Licensed Professional Required:
Call a plumber if the floor flange is broken, floor shows water damage, or you need to relocate plumbing. Flange repairs require cutting into flooring and proper sealing to prevent sewer gas leaks.
For toilet repair guidance, see our article on fixing a running toilet with basic parts and tools.
Some bathroom renovations deliver good ROI but exceed DIY-safe scope. These projects involve permits, code compliance, and specialized skills.
Removing and installing tubs or shower units requires plumbing modifications, waterproofing expertise, and proper drain connections. Mistakes create water damage that costs thousands to repair.
Why Professional Installation Matters:
Shower pan installation requires precise slope for drainage. Improper waterproofing causes hidden leaks that rot subfloors and wall framing. Most jurisdictions require licensed plumbers for drain connections and inspections.
Cost Range:
ROI Expectation:
Mid-range shower and tub replacements return 55-65% at resale. Focus on standard sizes and neutral finishes rather than custom features.
Swapping a vanity that uses existing plumbing locations stays DIY-safe. Moving supply lines or drain positions requires a licensed plumber.
DIY-Safe Vanity Work:
Installing a new vanity cabinet and countertop where plumbing connections remain in the same locations. This involves carpentry and basic plumbing connections but no pipe modifications.
Licensed Professional Required:
Cost Range:
For budget-friendly vanity updates you can do yourself, check our DIY bathroom vanity makeover guide.
Adding bathroom circuits, installing GFCI protection, or upgrading electrical panels requires licensed electricians in all jurisdictions.
Why This Isn’t DIY:
Electrical code violations create fire hazards and liability. Improper GFCI installation fails to protect against electrocution. Insurance claims get denied for unlicensed electrical work.
Permit Needed:
All electrical work beyond simple fixture replacement requires permits and inspections. Permit costs run $50-$200 depending on scope.
Cost Range:
Installing new exhaust fans requires cutting into ceilings or walls, running ductwork, and making electrical connections. Improper installation causes moisture problems and mold growth.
Licensed Professional Required:
This project involves electrical work, structural cutting, and proper venting to building exterior. Most building codes require licensed contractors for ventilation installations.
Cost Range:
ROI Benefit:
Proper ventilation prevents moisture damage and mold, issues that kill home sales. This investment protects your property value even if direct ROI is modest.
Some popular bathroom upgrades cost more than they return at resale. Avoid these projects if maximizing ROI is your goal.
High-end faucets, designer tile, and premium materials rarely return their cost. Buyers appreciate quality but won’t pay thousands extra for luxury bathroom finishes.
Low-ROI Examples:
Better Alternative:
Choose mid-range fixtures with good warranties. Kohler, Delta, and Moen offer quality products at reasonable prices that appeal to buyers.
Adding square footage to bathrooms requires structural work, plumbing extensions, and significant investment. ROI rarely exceeds 50% for bathroom additions.
Why Expansions Underperform:
Cost per square foot for bathroom additions runs $200-$400, but added value rarely matches investment. Unless your home has inadequate bathroom count for its size, expansions don’t pay back.
Cost Range:
Bold tile patterns, unusual colors, and trendy fixtures limit buyer appeal. What looks current today appears dated in five years.
Examples to Avoid:
Better Approach:
Stick with classic subway tile, neutral colors, and timeless fixtures. Boring sells better than bold in bathroom renovations.
Strategic planning maximizes returns and prevents costly mistakes. Follow this framework before starting any bathroom project.
Your bathroom should match your home’s overall value. Over-improving creates investments you won’t recover.
General Guidelines:
Walk through open houses in your area. Your bathroom should meet but not significantly exceed neighborhood standards.
Questions to Answer:
Include 20% contingency for unexpected issues. Bathroom projects commonly reveal hidden problems once work begins.
Budget Categories:
Fix problems before upgrading aesthetics. Leaks, poor ventilation, and outdated plumbing create bigger issues than ugly tile.
Priority Order:
More isn’t always better. Once your bathroom meets current standards for your market, additional investment yields diminishing returns.
Signs You’re Over-Improving:
For more guidance on DIY project planning, see our article on easiest DIY upgrades with big payoff.
Avoid these errors that reduce returns and create problems during home sales.
Unpermitted work creates liability and complications during home sales. Buyers’ lenders often require permits for bathroom modifications.
When Permits Are Required:
Permit Costs:
Most bathroom permits cost $50-$300 depending on scope. This investment protects your legal position and ensures code compliance.
Confidence is good; overconfidence costs money. Know when projects exceed DIY-safe scope.
Warning Signs:
Low-quality fixtures fail quickly and look cheap. Mid-range products offer better durability and appearance without luxury pricing.
Where to Invest:
Where to Save:
Mold, mildew, and water damage kill bathroom value. Address moisture problems before cosmetic updates.
Common Moisture Problems:
Solutions:
Install or upgrade exhaust fans, fix leaks immediately, recaulk tubs and showers annually, and use moisture-resistant materials throughout.
Your bathroom renovation should appeal to future buyers, not just your preferences. Neutral choices maximize ROI.
Market-Friendly Choices:
What bathroom renovation has the highest ROI?
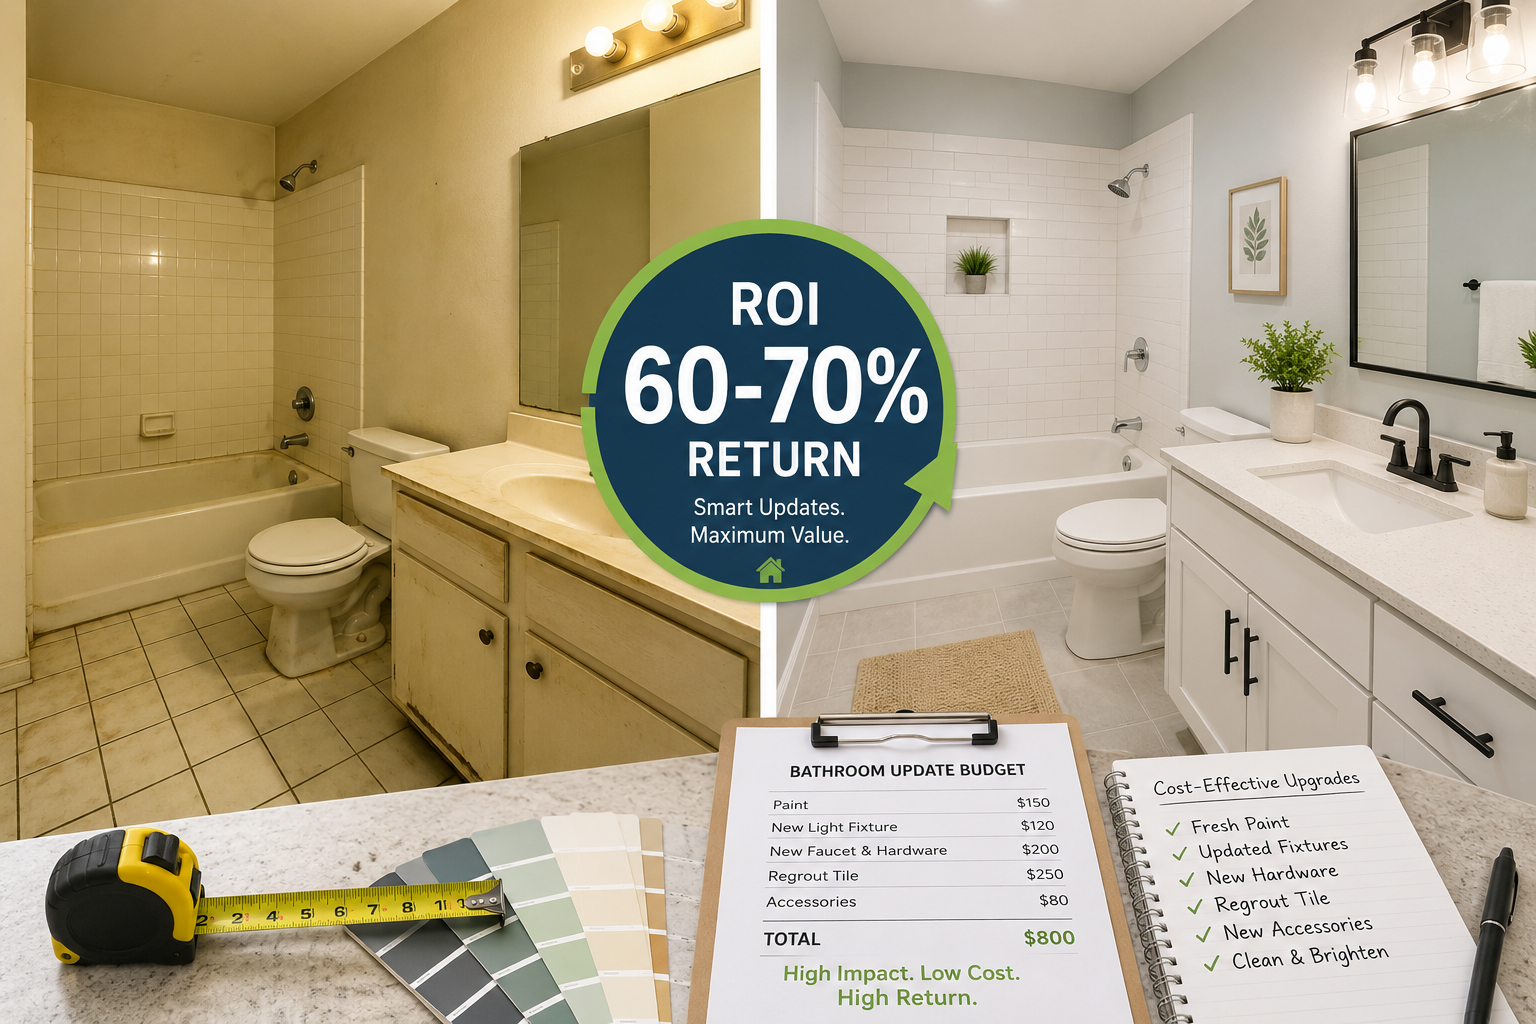
Minor bathroom remodels focusing on fixture replacement, fresh paint, updated hardware, and improved lighting deliver 60-70% ROI. These projects cost $3,000-$8,000 and update appearance without major construction. Faucet replacement alone often returns 75-80% because buyers immediately notice modern fixtures.
Should I remodel my bathroom before selling?
Remodel only if your bathroom is significantly outdated or has functional problems. Fresh paint, new fixtures, and deep cleaning often suffice for homes with bathrooms less than 15 years old. Full remodels make sense when bathrooms have dated tile, worn fixtures, or visible damage that affects buyer perception.
Can I increase home value with DIY bathroom updates?
Yes. DIY-safe projects like painting, fixture replacement, hardware updates, and grout cleaning cost $200-$800 and can increase perceived value by $2,000-$5,000. Focus on visible improvements that signal good maintenance rather than hidden upgrades buyers won’t notice.
How much should I spend on a bathroom remodel?
Limit bathroom renovation budgets to 5-10% of your home’s value. A $300,000 home supports $15,000-$30,000 in bathroom improvements, while a $150,000 home should keep budgets under $15,000. Over-improving rarely returns additional investment at resale.
What bathroom features do buyers want most?
Buyers prioritize functional fixtures, good lighting, adequate storage, neutral finishes, and clean appearance. Modern faucets, working ventilation, fresh paint, and updated lighting rank higher than luxury features like heated floors or designer tile. Focus on meeting current standards rather than exceeding them.
Is it worth replacing a bathtub?
Replace tubs only if current units are damaged, stained beyond cleaning, or significantly outdated. Tub replacement costs $1,500-$4,000 and returns 55-65% at resale. Refinishing existing tubs costs $300-$600 and often provides better ROI for tubs in decent condition.
Bathroom renovations with the highest ROI focus on visible improvements that signal good maintenance without over-improving for your market. The sweet spot sits between $3,000-$15,000 for most homes, targeting fixture updates, fresh finishes, and functional improvements rather than luxury features.
Your Action Plan:
Next Steps:
Begin with the lowest-cost, highest-impact projects first. Replace leaky faucets, apply fresh paint, update hardware, and clean grout before considering larger renovations. These projects take 1-3 days, cost under $500, and immediately improve your bathroom’s appearance.
Remember that bathroom renovations serve two purposes: improving your daily life and protecting resale value. Focus on projects that accomplish both goals rather than chasing maximum ROI at the expense of livability. The best bathroom renovation is one you can afford, complete safely, and enjoy until you sell.
For more DIY guidance and project ideas, visit our complete collection of home improvement projects.