Phone:
(701)814-6992
Physical address:
6296 Donnelly Plaza
Ratkeville, Bahamas.

Phone:
(701)814-6992
Physical address:
6296 Donnelly Plaza
Ratkeville, Bahamas.
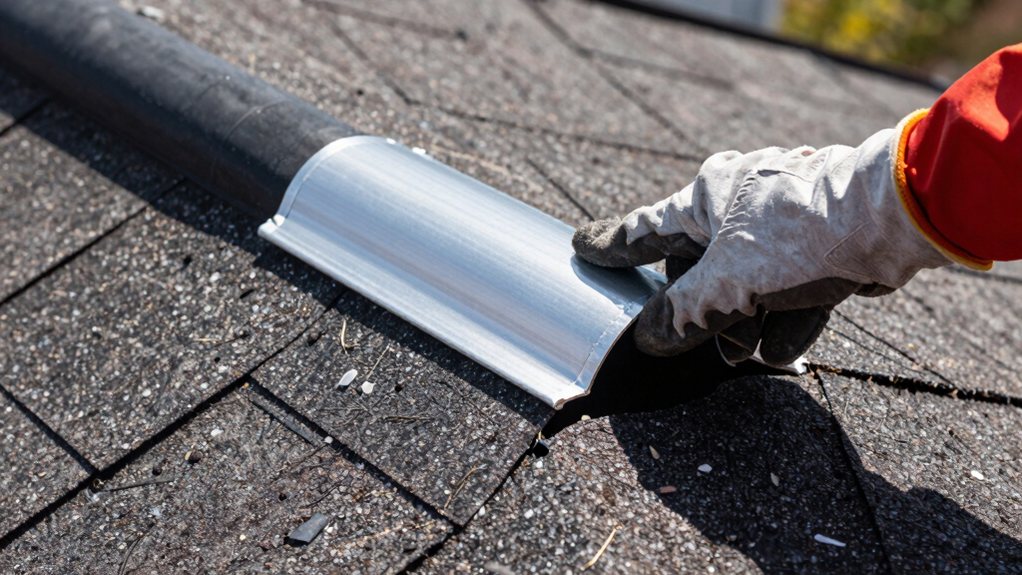
Learn the right way to seal with flashing, not just caulk, to ensure a lasting and waterproof seal for your chimney or vent pipe.
To seal around a chimney or vent pipe, you can’t just rely on caulk, as it cracks and fails quickly. Instead, install proper metal flashing. You’ll tuck step flashing under your shingles and lock counterflashing into a groove in the brick. Seal joints with a high-temperature roofing sealant, not regular caulk, especially near hot flues. Following these steps creates a durable seal, and there’s more to learn about keeping it watertight for good.
Table of Contents
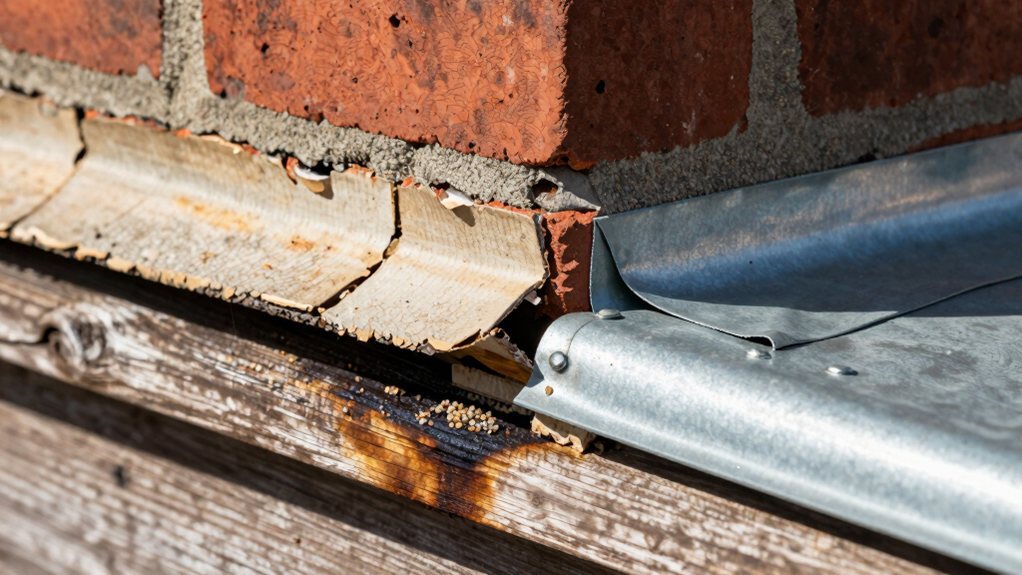
While you might think a generous bead of caulk is all you need to stop leaks around your chimney, that strategy is pretty much setting yourself up for a headache down the road.
The main issue is that ordinary caulk just can’t handle the job. It degrades from sun and weather within a few years, long before your actual Chimney Flashing or bricks fail.
It also can’t stretch and shrink with the different movements of the metal, roof, and masonry, so cracks quickly reappear. Plus, near the hot flue, temperatures often exceed caulk’s low heat limits. Think of caulk as a temporary helper, not the main event. Relying on it alone for a seal is like using a bandage on a broken pipe—it might look okay for a minute, but the leak will be back. Also, environmental factors like humidity above 70% and temperature swings can hasten caulk degradation and compromise seals.
You’ll want to pick a tough metal like copper or heavy-gauge steel for your chimney flashing, as these materials last for decades, while thin aluminum can wear out quickly against masonry.
Pair that metal with a professional-grade roof and flashing sealant, checking that it’s rated for higher temperatures if it’s near the hot flue pipe, because ordinary caulk just can’t handle the heat and weather.
Finally, a clean surface and a careful, continuous bead over all the seams and nail heads will make your seal secure and keep your home dry for years to come.
Also consider using a corrosion-resistant underlayment when working with thin aluminum, since it can react with masonry and wear faster.
Because your chimney flashing needs to stand up to sun, rain, and heat for years, choosing the right metal matters. Copper is your premium, durable champion, often lasting decades.
For a great balance of cost and durability, consider galvanized or stainless steel; stainless resists rust best. Aluminum is lightweight and budget-friendly, but it’s not a great teammate for masonry or other metals, as it can corrode faster.
A vital rule: avoid letting dissimilar metals, like copper and galvanized steel, touch directly. If they must meet, use a proper flashing junction or a non-conductive barrier to stop galvanic corrosion. Think of it as keeping feuding materials separated so your seal lasts. If you’re also updating your home’s exterior, consider matching carefully selected luxury modern house numbers to complement your flashing.
Once you’ve picked a sturdy metal for your flashing, it’s time to find its perfect partner: the right sealant.
Your roof flashing is only as good as the goo that seals it to the masonry, so don’t skimp here!
A cheap caulk will crack and fail, leaving you with leaks.
Instead, look for three key things:
Prep surfaces properly—clean and dry—so your sealant sticks for good.
Also consider sealants with good UV resistance to avoid yellowing and degradation over time.
Often, the secret to a leak-free chimney isn’t just the materials you choose, but how you put them together.
Start with a clean, dry surface for the best sealant adhesion. Run a continuous, uniform bead of your chosen sealant along every critical joint and over any nail heads.
Think of it as drawing a careful, unbroken line with a marker—no skips allowed! Apply it sparingly; a fat, gloppy bead won’t last longer and can crack.
Your goal is a flexible, waterproof barrier that can handle the chimney’s heat cycles and our wild weather. A neatly tooled sealant line looks professional and performs reliably for years, giving you real peace of mind about your cozy, dry fireplace. Also consider complementing your flashing work with proper weatherstripping around exterior openings to enhance the overall seal.
Now, let’s roll up our sleeves and tackle installing the base and step flashing—this is where you really lock in your chimney’s watertight defense.
Think of it as building a durable, layered shield right where your roof meets the brick.
1. Start with a solid base. First, install a continuous apron flashing on the roof-facing side of your chimney.
Tuck its top edge up behind the brick and bend the bottom over the roof to create a drip edge that sends water running away.
2. Layer shingles and steps. As you lay each course of shingles, place an L-shaped step flashing piece over it.
Its vertical leg sits against the chimney, while the horizontal leg laps over the shingle below.
3. Secure and seal the deal. Overlap each step flashing by at least 2 inches.
Nail only the upper flange to the roof deck, and dab a little sealant on those nail heads for good measure.
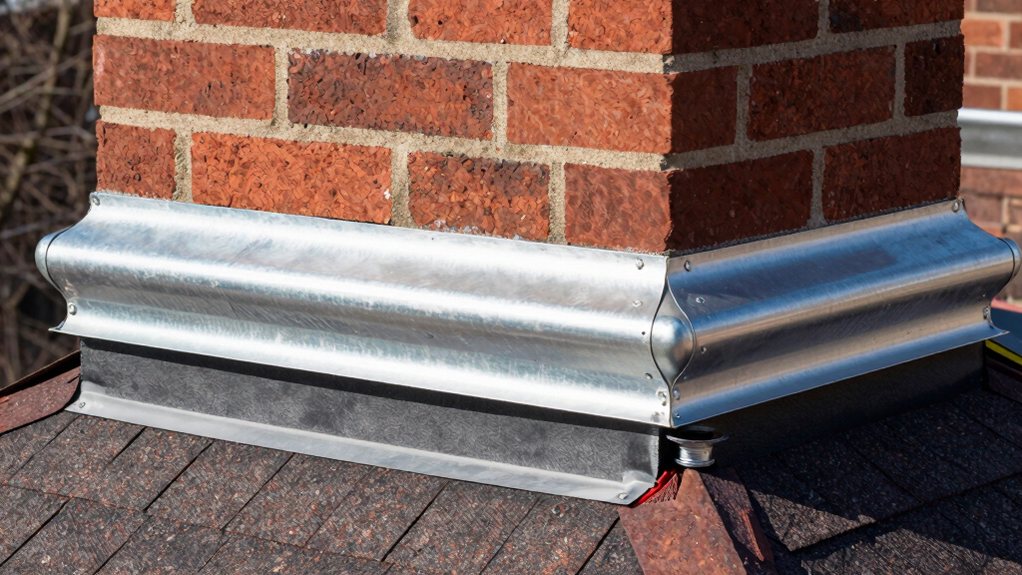
Embedding counter-flashing into your chimney’s masonry is like giving your roof a final, custom-fitted raincoat—it’s the permanent cap that locks everything in place.
First, you’ll cut a reglet into the mortar joints about 3/4-inch deep. Tuck your metal flashing at least an inch into this slot.
Now, bed that edge with flexible mortar, striking it flush to lock the metal in mechanically—this is the hero move that stops water in its tracks. Overlap the step flashing below by a good two inches. Remember, you want stepped pieces that follow each brick course; this shares the waterproofing duty. If you mortar it right, you can skip the top sealant, which is a win, because caulk can’t hide a job well done. Always prime and apply a waterproofing membrane in high-moisture zones before embedding flashing to ensure a lasting seal.
Now, let’s get your vent pipes and through-wall areas watertight.
You’ll install pipe collars that fit the actual pipe size and slip them over your base flashing.
Sealing them generously with high-temperature sealant if they’re near heat.
For through-wall flashing, remember it needs to slope properly to guide water out through a drip edge.
Nobody wants a surprise indoor waterfall.
How exactly do you keep water from sneaking in around a vent pipe or chimney?
The right flashing techniques are your best defense to protect your home.
It’s simpler than you think if you follow a solid plan.
1. Start with a solid base.
For a roof pipe, use a metal or prefab boot sized to the pipe’s outside diameter.
Slip it under the shingles 3–4 inches so water sheds right over it.
2. Add a storm collar.
Fit this above the base flashing, tighten it snug, and seal behind it with a high-temperature sealant.
This stops capillary wicking but allows the pipe to expand and contract.
3. Don’t forget the sealant.
Always bed nail heads and seals with compatible roofing sealant—not just any silicone—
and check these spots twice a year for gaps or wear.
When you’re dealing with a pipe that needs to go through your wall, the real trick is making sure the wall itself stays dry, which means flashing it properly is your next big move.
First, cut your opening a bit bigger than the vent, then carefully carve a neat reglet into those sturdy chimney bricks. Slip your metal flashing into that groove, making sure it slopes outward to shed water.
Slide the pipe through and center it, but use a bracket for support so the flashing isn’t holding the weight. Next, seal the deal with a pipe boot and storm collar, fastening them securely.
Finally, tuck the counterflashing into the reglet and seal it all up—your reward is a dry wall after the first good rain. Consider hiring professional door frame installation services for expert flashing and sealing.
Small gaps can often be resealed with quality caulk, but major damage means replacement is likely needed.
So, you’ve got the know-how now to tackle that leaky chimney. Remember, good flashing is your roof’s best defense against water, so take your time with each step. You’re not merely patching a hole; you’re building a long-lasting seal. With the right materials and a bit of patience, you can stop those drips for good. Grab your tools and show that chimney who’s boss!