Phone:
(701)814-6992
Physical address:
6296 Donnelly Plaza
Ratkeville, Bahamas.

Phone:
(701)814-6992
Physical address:
6296 Donnelly Plaza
Ratkeville, Bahamas.

Want to fix hardwood floor gaps? Learn the correct method for a seamless repair that lasts.
Before you fill hardwood floor gaps, figure out if they’re seasonal or permanent. For seasonal gaps that change with humidity, you’ll want flexible caulk so it moves with the wood. For stable, permanent gaps, a sturdy wood filler works best. Start by vacuuming the gap clean, then apply your chosen filler, let it cure fully, and sand it flush. Stick with that, and you’ll uncover the tricks for a seamless fix.
Table of Contents
Before you grab the wood filler, it’s important to understand that not all gaps in your hardwood floor are created equal. If you live in an old house, you need to look closely at those gaps.
Small ones that appear in dry winter and vanish in humid summer are just your hardwood floors breathing. Filling these seasonal gaps with rigid putty is like giving your floor a too-tight belt—it can cause cracks or buckling.
Instead, only fill permanent gaps that stay put year-round, especially those wider than about 1/16 inch. If you’re ever unsure, check during the muggy summer when boards are swelled tightest, or call a pro for a quick assessment to avoid a costly mistake. Before making repairs, use a straightedge to check for underlying substrate dips, humps, or daylight that could affect any filler or finish.
While it may seem like your hardwood floor is playing a frustrating game of hide-and-seek with its own boards, those gaps actually have a simple, natural explanation. The real reason is your home’s humidity. Your solid wood floors are alive, expanding in summer’s damp air and shrinking when your indoor air gets dry in winter.
In older homes, this seasonal swing can be dramatic, making boards pull apart several millimeters. This movement is normal and necessary to make sure your wood floors don’t buckle later.
Gaps that stay wide even in summer, however, signal a permanent problem like improper installation or a board that didn’t dry completely before being laid. Consider using a professional wood refinishing kit to address gaps and restore finish.
Now, let’s find the right fix for your floors by checking if those gaps are seasonal visitors or permanent residents.
Once you’ve figured that out, you’ll pick materials that can handle the job, like flexible caulk for moving gaps or sturdy wood filler for stable ones.
Then, with your materials ready, you’ll follow a few straightforward steps to apply them neatly and get your floor looking great again.
Also inspect for water damage under sinks and around appliances before choosing a filler, since moisture can cause recurring gaps.
Since hardwood floors have a mind of their own, expanding in summer humidity and shrinking in winter dryness, your first step is to figure out whether you’re dealing with a seasonal visitor or a permanent guest.
Start some simple moisture monitoring and gap mapping over a full year. Do a bit of seasonal logging, checking those gaps in both the muggy summer, when wood is at its largest, and the dry winter.
If a gap nearly vanishes when it’s humid, it’s just seasonal—leave it alone or use flexible caulk. Permanent gaps, ones that stick around year-round, are a different story. Measure them during the humid season when they’re smallest; if they stay about 1/16” wide, you can safely fill them with wood filler. For concrete or below‑grade subfloors prioritize a built‑in vapor barrier to protect the wood from moisture.
Once you’ve determined whether you’re dealing with seasonal or permanent gaps, picking the right stuff to fill them is your next move.
For narrow, stable gaps, wood filler is a solid choice, while wide, permanent ones often need thin wooden strips for a seamless fix. Always match your filler’s color to your floor for a natural look.
Your tool selection is simple—a putty knife for filler and a saw for strips. A quick cost comparison shows flexible sealant is cheap, while custom wood strips cost more but last.
Don’t forget safety precautions like good ventilation when using chemicals and keeping tools sharp but handled carefully. A little prep prevents a big headache later.
Consider a professional caulking kit to ensure you have the right tools for sealing and finishing.
Getting the actual filling part right is a bit like following a recipe—skip a step and you might end up with a mess.
First, vacuum the gap thoroughly; dust is the enemy of a good bond.
Next, follow your chosen product’s instructions to the letter.
For wood filler or epoxy on permanent gaps, overfill slightly, then scrape flush once it’s firm.
With flexible caulk, use a damp finger to level the bead.
Your application checklist isn’t complete without safety precautions: wear gloves and provide good ventilation.
Remember tool maintenance—wipe your putty knife clean immediately, because dried filler is a chore to remove later.
Finally, the golden rule: respect the dry time, usually about 24 hours, before you sand or stroll across your handiwork.
Also, when cleaning finished floors before filling, choose a pH-neutral formula to avoid stripping the finish.
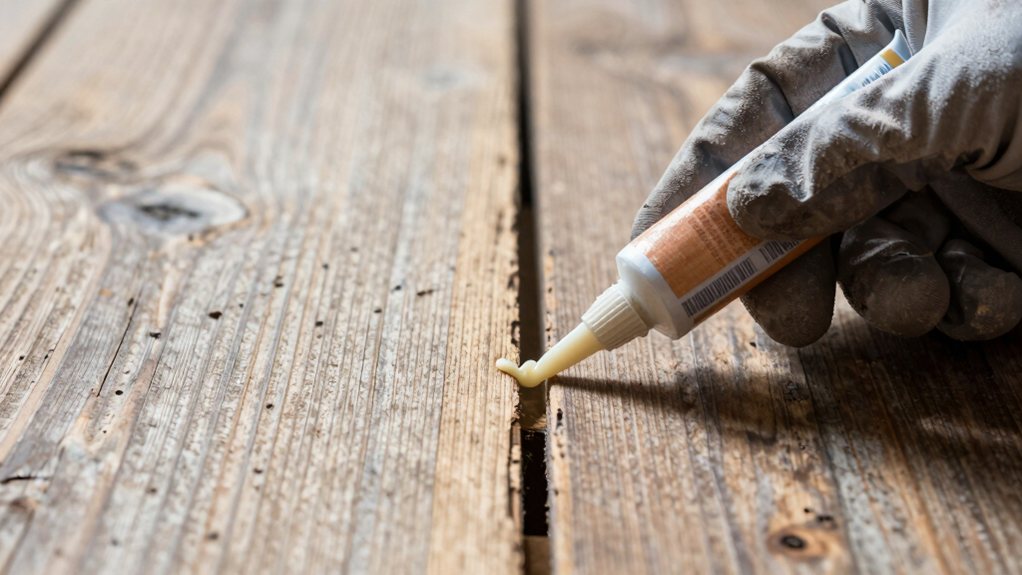
Tackling those seasonal gaps in your hardwood floors is a smart move that can save you from drafts and dust, and flexible caulk is your go‑to solution because it moves right along with the wood.
Flexible caulk smartly seals seasonal hardwood floor gaps, stopping drafts and dust as it moves with the wood.
For underlying structural issues consider contacting professional floor joist repair providers.
First, check manufacturer guidance for product specifics and note any warranty considerations for your floor.
Always work in a well‑ventilated area as a good health precaution.
Now, get started!
Vacuum the cracks clean, then load your color‑matched acrylic or silicone caulk.
Use your caulking gun to fill the gap, slightly overfilling it.
Here’s a pro tip: wet your finger or a polishing tool with soapy water before you glide it over the bead for a perfect, clean finish.
Let it cure for a full day before you walk on it.
If you’ve got bigger gaps that stick around all year, the wood filler method is your friend.
You’ll want to gather your supplies—like a vacuum, color-matched filler, and a putty knife—to get started.
Let’s walk through how to identify those permanent gaps, pick the right materials, and apply the filler for a seamless, lasting fix. Also be sure to perform moisture testing beforehand to ensure proper adhesion and avoid future bond failure.
So, how can you tell if those pesky gaps in your hardwood floor are here to stay? First, timing is key. Check during the humid season when boards are tightest.
Any gap that remains open year-round, especially if it’s about 1/25” to 1/16” wide, is likely permanent. Next, investigate the cause. Consider a fastener inspection for loose nails, look for signs of subfloor settling, or even do a little moisture mapping to rule out hidden dampness.
If the gap size doesn’t change over a few weeks, you’ve found a candidate for a rigid wood filler fix. Just remember, if it still breathes with the seasons, you’ll need a flexible solution instead. Also, leave expansion gaps around the room perimeter to accommodate seasonal movement and prevent cracking.
Now that you’ve spotted a permanent gap, let’s get it filled. You’ll need a vacuum, color‑matched wood filler, a putty knife, masking tape, sandpaper, and a rag.
Always choose a filler specifically made for hardwood floors; it bonds better and looks right.
For safety considerations, work in a well‑ventilated area and consider wearing a dust mask while sanding.
Check the storage guidelines on your filler’s container to keep it usable for future touch‑ups.
When selecting products, think about their environmental impact—some brands offer low‑VOC options, which are better for your indoor air.
Getting the right stuff upfront makes the whole job easier, like having the perfect tool for a simple fix.
Consider a professional furniture refinishing kit to have all the right supplies in one package.
Applying wood filler to those stubborn gaps is like giving your floor a seamless new smile, and you’re just a few careful steps away from making it happen.
First, vacuum the gap thoroughly—this is a key safety precaution to guarantee good adhesion. Then, mask the floor on either side with painter’s tape.
Scoop your color-matched filler onto a putty knife; good application ergonomics mean you’ll press it in firmly, slightly overfilling. Focus on color blending by choosing a filler that truly matches your floor’s tone.
Now, the hardest part: patience! Let it cure fully, usually for 24 hours.
Once dry, sand it flush until perfectly even, vacuum up the dust, and admire your handiwork.
While you might think filling wide gaps in your hardwood floor is a job for a professional, with a bit of patience and some scrap flooring, you can tackle it yourself and get a beautiful, lasting repair.
Think wide floor gaps need a pro? With patience and scrap wood, you can achieve a beautiful, lasting repair yourself.
Start by vacuuming the gap clean, then measure its length and width precisely.
Your Workshop Setup matters—cut a color-matched strip from your Offcut Storage on a table saw for a perfect fit.
Chamfer the bottom edges so it slides in easily.
Apply wood glue to the strip and the gap, then gently tap it home with a rubber mallet until it’s flush.
Wipe any excess glue immediately!
Consider taking photos for your Repair Documentation; it’s satisfying to see your before-and-after.
Let the glue cure fully for at least 24 hours before you sand and finish the spot to blend it seamlessly.
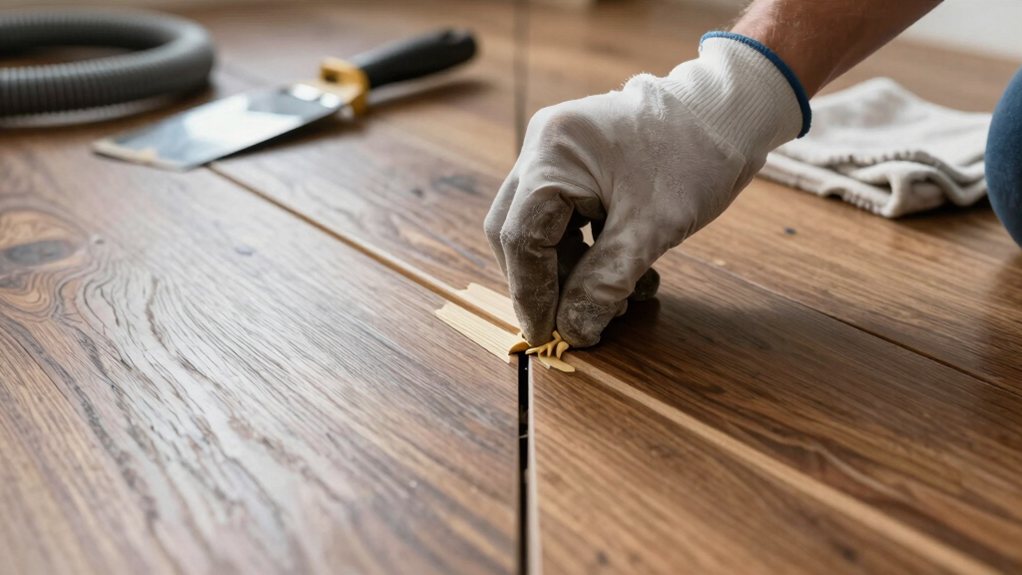
Even though you’ve got the tools and the motivation to fix those hardwood floor gaps, a few common slip-ups can turn a promising repair into a headache you’ll have to redo.
First, never use a rigid filler like epoxy in a gap that moves with the seasons, as it will just crack. Always vacuum the gap first, because debris weakens your bond.
Don’t skip safety precautions like good ventilation when using strong products.
For a seamless look, nail your finish matching with a color-matched flexible caulk for small, seasonal gaps.
Finally, respect the curing time—walking on it too soon ruins everything. A little patience and proper tool maintenance keep your repair looking great for years.
So, you’ve tackled those gaps in your hardwood floors. Remember, choosing the right fix, whether it’s flexible caulk or wood strips, makes all the difference. Your patience and care now will keep your floors looking beautiful for years to come. Give yourself a pat on the back for a job well done, and enjoy your sleeker, more polished space. You’ve earned it!