Phone:
(701)814-6992
Physical address:
6296 Donnelly Plaza
Ratkeville, Bahamas.

Phone:
(701)814-6992
Physical address:
6296 Donnelly Plaza
Ratkeville, Bahamas.
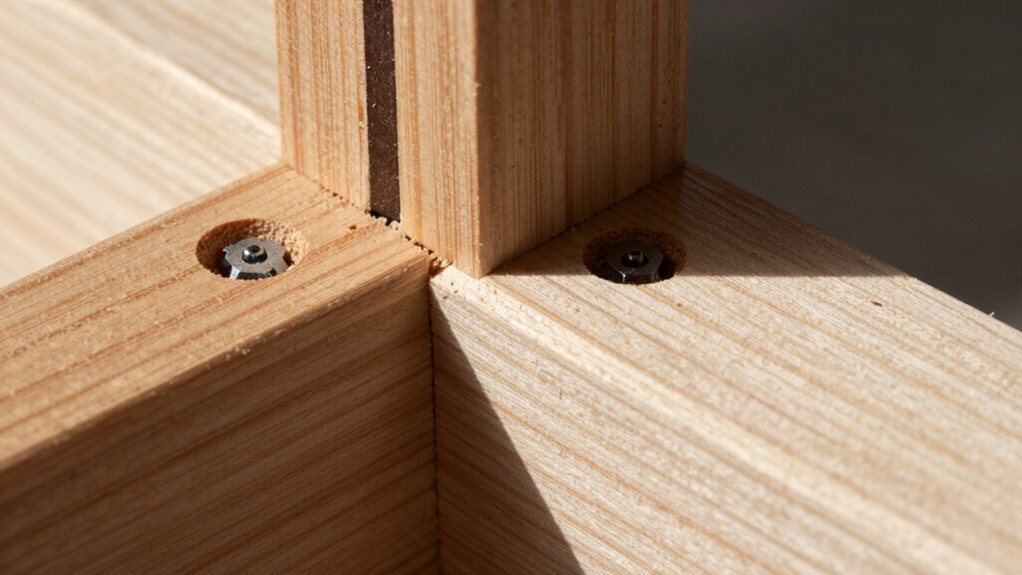
I explain pocket holes, biscuits & dowels for wood joints, so you can choose the right method for your next project.
You’ve got a few strong, clean options for joining wood. Pocket holes are the fastest for projects like cabinets, hiding screws inside. Biscuits are your best bet when you need perfect alignment, like for a tabletop, as they create a flush glue joint. For maximum strength in load-bearing furniture, choose dowels. Picking the right one simply depends on whether you value speed, alignment, or raw strength the most. We’ll break that all down for you next.
Table of Contents
So, you’re staring at your wood pieces, ready to join them, but you’re stuck wondering which method to grab from your toolkit—pocket holes, biscuits, or dowels?
The choice hinges on your project’s needs.
For speed and strength where screws can be hidden, choose pocket-hole joints; they’re perfect for face frames or boxes.
For fast, strong joinery with hidden screws, pocket-hole joints are ideal for face frames or cabinet boxes.
If you’re aligning long edges for a tabletop, biscuits offer quick alignment but need glue and clamps.
For invisible, high-strength joints in fine furniture, dowels are your champion, though they demand precision.
Consider your materials and whether you’ll see the joinery.
Each method has its superpower, so picking the right one just makes your build easier and your final piece sturdier.
Consider investing in a woodworking tools professional set to ensure you have the right tools for each method.
Picking pocket holes from your joinery options means you’ve chosen speed and solid strength, especially when you want those screws hidden from view.
You’ll use them for cabinets, face frames, and simple edge-to-edge panels, like tabletops, where they pull faces tight for immediate, glue-free strength.
They’re perfect for on-site assembly or adding adjustable shelves later.
Just set your jig to your board’s thickness, drill your pocket holes about 1–2 inches from the ends and every 6 inches along the joint.
Remember to pick the right screw: coarse threads for softwood or plywood, fine for hardwood.
It’s wonderfully straightforward joinery that delivers remarkably robust results without any complex fuss.
For consistent results, consider investing in a quality professional woodworking tools set tailored for joinery tasks.
If you’re looking for a joinery method that helps you line things up perfectly while also boosting your glue’s holding power, biscuit joinery is a fantastic choice.
Think of biscuit joints as friendly little alignment helpers.
You’ll typically use size‑20 biscuits, which fit your tool’s slots and are about as thick as a coin.
When you plunge your joiner, aim for a 3–4 mm deep slot.
Space them every 6 to 12 inches, adding a few extra near the ends for good measure.
Remember, the real magic happens with glue.
Slather it into the slot and on the faces—the biscuit swells, creating awesome surface contact.
It’s not for heavy lifting, but for keeping everything flush during assembly, it’s a total game-changer.
Consider investing in premium woodworking tool sets for consistent results.
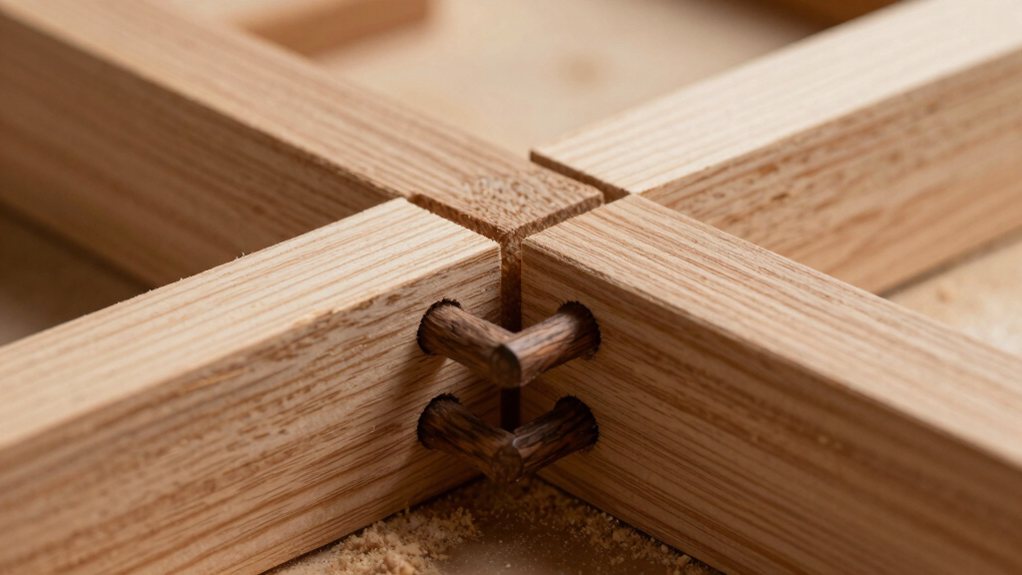
While biscuit joinery is your go‑to for quick alignment, sometimes you need a joint that’s practically bulletproof—and that’s where dowel joinery really shines.
It gives you maximum strength and precision for load-bearing spots like table aprons or chair rails.
You’ll want common diameters like 1/4″ or 1/2″, making sure you leave at least 3/8″ of solid wood around each hole. Drill mating holes to half the dowel’s length in each piece, slather on plenty of wood glue in the holes and on the dowels, and assemble.
For perfect alignment, skip freehand drilling! Use a doweling jig or drill press, spacing dowels 4″ to 6″ apart and staggering them. It’s a super-strong, less fussy alternative to a complex mortise-and-tenon.
Using a professional woodworking tool set can make drilling and alignment faster and more accurate.
Now that you’ve seen how dowels deliver serious muscle for heavy-duty joints, it’s helpful to stack all your options side by side.
For pure speed, nothing beats a pocket-hole jig; you’re drilling and driving screws in minutes for a strong, hidden joint. Dowels are the strength champions but demand careful layout and drilling, so they’re slower.
Biscuits are the quick-alignment middle ground, great for lining up edges but relying on glue. For visibility, all three hide well—pocket holes tuck inside, biscuits vanish in their slots, and dowels bury themselves. For tool selection and versatility, consider a premium woodworking tool set that includes jigs, dowel pins, and biscuit joiners.
Now, let’s get you started with two common methods: pocket holes and biscuit joints.
You’ll find pocket holes are wonderfully quick for connecting boards at an angle, while biscuits are perfect for aligning wide panels edge-to-edge.
We’ll walk through the basic steps for each so you can pick the right tool for your project.
For reliable results, consider investing in professional workshop tool sets designed for craftsmen to ensure you have the right tools.
If you’re looking for a fast and sturdy way to connect wood, pocket-hole joints are a fantastic choice—they’re like a secret handshake for boards, creating strong connections that stay hidden from view.
You’ll need a pocket-hole jig.
Set it for your material’s thickness and drill those angled holes where you want the joint, usually starting 1–2 inches from the ends.
For best results, consider using a professional drill driver set to drive the screws efficiently.
Since you’ve got pocket holes down, let’s explore another woodworking favorite: the biscuit joint, which acts like a hidden wooden patch that locks boards together with surprising strength.
First, dry-assemble your pieces and mark the joint centers.
Transfer these marks to create a square reference line on each board’s end grain—labeling parts avoids mix-ups.
Next, grab your biscuit joiner. Set it flat, choose #20 biscuits, and align its fence with your reference line.
Clamp your board securely, then plunge to cut the slot.
For matching slots, use a scrap reference block for repeatable positioning.
After a dry-fit check, apply glue into the slots and on the faces, insert the biscuits, and clamp everything flush.
A slight side-to-side wiggle of the joiner when plunging gives you helpful play for perfect alignment.
Consider pairing this with a router table set for improved repeatability and safety.
Now that you’re ready to assemble your joints, picking the right fasteners is key.
You’ll want to match your pocket-hole screw threads to your wood type—coarse for softwoods and plywood, fine for hardwoods—and choose a length that gives you a solid grip without poking through.
For biscuits and dowels, stick with common #20 biscuits for alignment and standard dowel sizes like 1/4″ or 3/8″, making sure they’re compatible with your project wood for a tight, strong fit.
For drilling pilot holes and driving screws efficiently, consider using a professional cordless drill set that offers variable speed and torque.
How do you make sure your woodworking joints stay tight and strong for years? It starts with making sure you’ve got the right screw for the job. Using the wrong type is like wearing dress shoes for a hike—it just doesn’t work well!
For pocket holes, thread choice is key for a good bite. Your jig’s manual or the maker’s online Screw Selector tool is your best friend here for final confirmation.
To build a reliable project, remember these four guidelines:
If you’re mounting shelves, consider choosing professional floating shelf hardware rated for the load to ensure lasting support.
With your screw selection squared away, let’s look at two more great ways to lock pieces of wood together: biscuits and dowels.
For biscuits, #20 is your go-to for most jobs.
They’re perfect for aligning edges, like on a tabletop.
Remember, a biscuit joiner cuts a slot, and you’ll want to use enough biscuits spaced along the joint for solid alignment—don’t just toss in one or two and hope for the best!
When choosing dowels, match the diameter to your board’s thickness; common sizes range from 1/4″ to 1/2″.
The real secret is using multiple, smaller dowels spaced out rather than one big one.
This gives you far better strength and keeps everything straight.
Always do a dry-fit first to mark your locations.
So you’ve got the scoop on pocket holes, biscuits, and dowels. Remember, no one method is the best for every project. Just think about what you need most: speed, alignment, or raw strength. With this knowledge, you’re all set to pick the right joint for your next build. Go ahead, grab your tools and make something awesome—you’ve totally got this!