Phone:
(701)814-6992
Physical address:
6296 Donnelly Plaza
Ratkeville, Bahamas.

Phone:
(701)814-6992
Physical address:
6296 Donnelly Plaza
Ratkeville, Bahamas.

I'll show you simple fixes for a door that won't latch, like tightening hinges and adjusting the strike plate.
First, figure out why your door won’t latch. Tighten any loose hinge screws and fill stripped holes with glue and toothpicks if needed. If the door sags, you can shim the top hinge to lift it. For a misaligned latch, filing the strike plate hole or moving the plate itself usually does the trick. A quick clean and lube can also work wonders. Stick with me to master these simple fixes for good.
Table of Contents
So, why won’t your door latch properly? First, close the door slowly and watch how the latch meets the strike plate. If it sits above or below the hole, you’ve got an alignment issue, often from sagging hinges.
Next, try lifting the door while holding the handle; if it latches, those hinges are definitely the culprits—check for loose screws or worn barrels. You can also press lipstick on the latch and close the door to mark exactly where it hits the strike plate, revealing if it’s off-center.
Don’t forget to check for simple grime or paint buildup in the strike, as a little cleaning can sometimes be the easiest fix of all. If you’re unsure or prefer a guaranteed repair, consider hiring professional door frame installation experts to correct alignment and prevent future issues.
Addressing a door that won’t latch often boils down to one simple step: giving those hinge screws a good check and, if needed, a firm tightening. Grab a screwdriver and test every screw on all hinges—top, middle, and bottom.
If any turn easily or sit recessed, you’ve found your likely culprit. Tighten them snugly, but don’t overdo it and strip the soft wood.
For screws that just spin in a stripped hole, remove them, pack the hole with wood glue and toothpicks, let it dry, and try again. Often, the best fix is replacing short or wimpy screws with longer screws (like 3-inch #8s) that bite deep into the solid framing stud behind the jamb, pulling everything back into alignment. For best results consider high-quality components from a premium door hardware set to ensure durability and smoother operation.
If the hinge or strike plate screws won’t hold because the wood is stripped, you can fix it without much fuss.
First, clean out the old hole and pack it with something like glued toothpicks or a small dowel to give the screw new wood to bite into. Once your filler is set, you can reinforce everything by driving your screws back in, maybe even upgrading to longer ones that reach the stud for a rock-solid hold.
For extra durability in damp areas consider using PVC/vinyl, which is waterproof and wear-resistant.
Let’s get that hole ready for its close-up. Proper prep makes your fix last.
First, remove any loose debris from the old screw holes. Your goal is clean, solid walls for your filler to grip.
Each method creates a strong foundation so your next screw holds tight. For best results and to make sure you have the right adhesives and fillers on hand, consider a professional furniture refinishing kit to ensure you have the right adhesives and fillers for the job.
Now that your screw hole is cleaned and prepped, it’s time to fill it with something solid.
For small holes in the strike plate area, grab some wood toothpicks or matchsticks.
Dip them in wood glue, pack them tightly into the hole to fill the old screw cavity, and snap them off flush.
Let the glue get tacky, which usually takes about an hour.
For bigger, wobblier holes, drill it out neatly and glue in a hardwood dowel instead.
Whichever method you use, patience is your friend—let everything cure fully for a day before you even think about driving a new screw.
This creates a brand-new biting surface for your hardware.
For an easier repair and a professional finish, consider using a professional wood refinishing kit that includes the right tools and supplies.
With your filler material fully cured, it’s time to get serious about holding power.
Simply reusing the old screw often isn’t enough for a long-term fix.
Your goal is to anchor the hardware back into solid material, whether it’s your repaired wood or the stud behind the frame.
Here’s how to reinforce with screws effectively:
For best results, keep a professional cabinet hardware kit on hand to ensure you have appropriate fasteners and replacement parts.
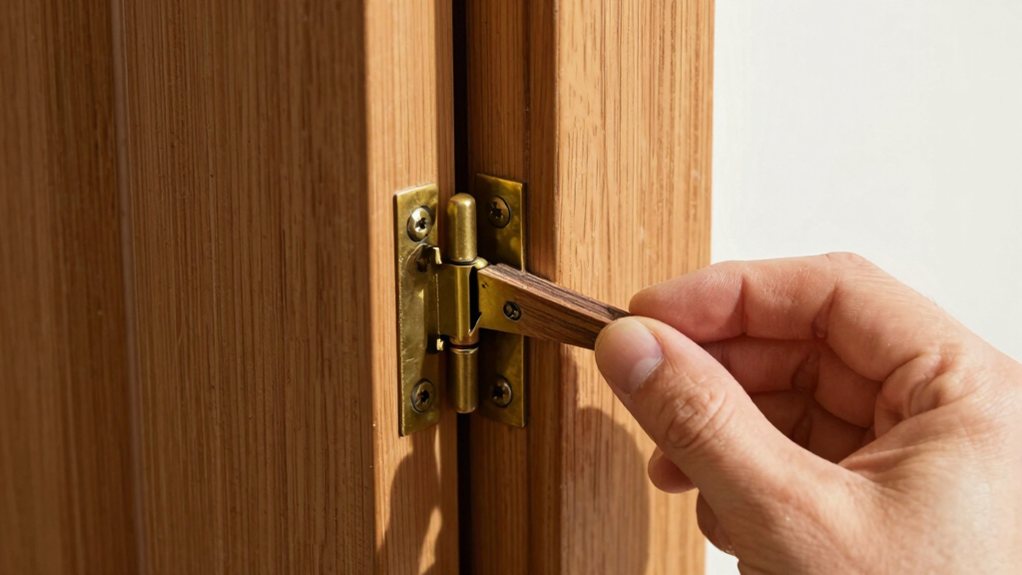
Shimming the hinges is a clever trick that can nudge a stubborn, sagging door back into place, almost like giving it a gentle nudge to remind it where it belongs.
If your door sags and won’t latch, the problem is often those door hinges.
Start by loosening the screws on the top hinge.
Slide a thin shim—metal for fire doors, plastic for others—into the mortise behind the leaf, near the barrel.
This tiny wedge, about 1/32” thick, pushes the top of the door toward the strike plate.
Tighten the screws back down.
If it still won’t catch, you can add a shim to the bottom hinge the opposite way.
A little adjustment here makes a big difference, straightening out that sagging door without a fuss.
For added protection and sealing you may also consider exterior door replacement weatherstripping to improve energy efficiency and block drafts.
If your door latch just barely misses the strike plate hole, you can often fix it by simply filing the hole a little bigger.
For a bigger miss, you’ll need to move the strike plate itself up or down, which involves marking the spot, chiseling a new recess, and securing it in place.
Once it’s repositioned, a few tests and some fine-tuning will get your door latching seamlessly every time.
If you’re considering upgrades, compare features of a smart door lock to ensure compatibility with your door and security needs.
Ever notice your door just won’t catch, no matter how hard you push? The culprit is often a misaligned latch and strike plate.
To diagnose it, close the door slowly and watch where the latch hits. Mark the contact point on the strike plate with a pencil or some lipstick.
Once you’ve marked where the latch is hitting, it’s time to get that strike plate in the right spot.
If the latch bolt misses the hole by less than an eighth of an inch, you’re in luck.
Grab a round file and gently enlarge the strike plate’s recess until the latch slides right in—no heavy lifting required.
For bigger gaps, you’ll need to move the whole plate.
Chisel a new mortise so the strike plate sits flush, letting the latch engage squarely.
Fill the old screw holes with toothpicks and glue, then secure the plate with its original screws.
Take it slow, test the fit often, and you’ll have that door latching seamlessly, no problem.
Consider matching trim or finishes and sourcing premium hardware to complement your door work.
Gently close the door and watch closely where the latch meets the jamb—this simple test reveals exactly how your strike plate needs to move.
If it misses the hole by a small amount, you can file the opening.
For a bigger miss, you’ll need to shift the whole plate.
Once you’ve made your adjustment, it’s time to test the door and secure everything for good.
A professional drill driver set can make driving longer screws easier and more precise.
If your door latch is missing the strike plate by more than a small margin, you’re likely dealing with a major alignment issue, and it’s time to reposition that plate.
When your latch misses the strike plate significantly, a major realignment is needed—repositioning the plate is your next essential step.
First, close the door slowly and mark exactly where the latch hits the door jamb.
Next, remove the old strike plate and fill its screw holes with glue and toothpicks.
Once that’s dry, carefully chisel a new mortise where you marked, so the plate sits perfectly flush.
Drill pilot holes and fasten the plate with longer screws for a solid bite into the wood.
Finally, test your door repeatedly.
You may need to enlarge the recess a bit more for a seamless, full engagement—a little fine-tuning makes all the difference.
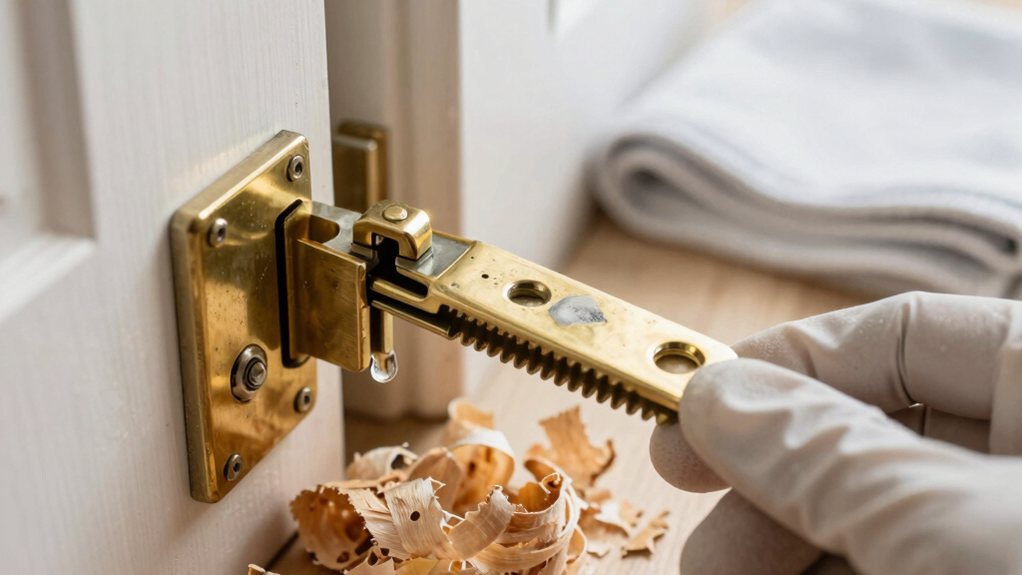
If your door latch feels sticky or won’t catch, it’s likely gummed up with dirt and old gunk.
You’ll want to take apart the knob to clean everything out, then get it moving freely again with the right spray.
It’s a simple fix that just needs a few tools and about ten minutes of your time.
* Inspect the strike plate: Look for shiny scrapes or dents on the metal.
These marks show exactly where your latch is hitting, telling you it’s misaligned.
* Check for debris: Peek inside the strike plate recess on the door frame.
A stray wood chip or glob of paint here can stop the latch dead.
* Test the alignment: Close the door slowly and watch how the latch meets the strike plate.
If it bumps the edge instead of sliding in, you’ve found the culprit.
Sometimes, a door latch just gets cranky and refuses to cooperate, like it’s decided to take the day off. To fix it, you’ll need to disassemble and clean the mechanism.
First, remove the handle and trim plates by unscrewing them. Then, unscrew and remove the latch assembly from the door’s edge.
Inspect everything! Blow out debris from the cavity and wipe away old grease or gunk from the bolt. For stubborn grime, apply a few drops of penetrating oil, let it sit, and work the bolt loose.
Give all metal parts a light scrub with a toothbrush and isopropyl alcohol, drying them thoroughly. Before you reassemble everything, check your hinges and latch alignment.
Once clean, reinstall the parts, tighten the screws, and test it. A final tip: after you remove the strike plate, apply a thin silicone lubricant to it and the bolt for seamless, quiet operation.
Cleaning out the gunk is a great start, but for a door that still stubbornly refuses to latch easily, it’s time for the magic step: lubrication.
A dry latch is a sticky latch.
Here’s how to get everything moving freely again:
Once back together, test your door.
If it still sticks, the issue might be alignment, not the latch.
Once you’ve pinpointed the exact spot where your door is sticking, you can get to work making it fit properly again, and the process is more about finesse than force. First, mark the rubbing area on the door frame and remove the strike plate to avoid damaging it.
Grab a sanding block or a low-angle hand plane and start by shaving off tiny amounts—think 1/32-inch increments—testing the door’s swing frequently. Your goal is to stop the moment the latch clicks home smoothly.
For bigger adjustments, a block plane helps you trim the jamb evenly. Finish by sanding the area flush, cleaning up the dust, and sealing the wood before you screw that strike plate back on for a final, satisfying test close.
* Replace hinges if screws strip despite using toothpicks, the door sags more than 1/8″, or you see corrosion and wobble.
These issues prevent a secure fit.
If droop returns, a full replacement fixes it for good.
New hardware gives your door a fresh, reliable start.
While you can often tackle a squeaky hinge or a stubborn latch yourself, there are times when a door’s problems point to something more serious, and that’s when you should call in a professional.
Some door fixes are simple DIY jobs, but others signal a need for professional expertise.
If the door that wont close has a visibly warped or cracked frame, or there’s a big gap, it’s likely a structural issue. Similarly, if multiple doors in your house are suddenly misaligned, it could signal settling foundations, which is a big deal.
Don’t force it! When door frames are bowed or the latch misses by more than 1/8 inch, a carpenter can properly plane or reframe things.
Also, call a pro immediately for exterior or fire-rated doors, because security and safety aren’t DIY projects. Sometimes, knowing when to call for help is the smartest fix.
So, you’ve tackled that stubborn door! Remember, most latch issues are simple fixes you can handle yourself. Tighten those screws, adjust the plate, and don’t be afraid to shim a hinge. If the problem feels bigger, like a warped frame, it’s perfectly okay to call in a pro. Now, enjoy your properly closing door—and maybe celebrate with a graceful, latch-clicking victory dance! You’ve earned it.