Phone:
(701)814-6992
Physical address:
6296 Donnelly Plaza
Ratkeville, Bahamas.

Phone:
(701)814-6992
Physical address:
6296 Donnelly Plaza
Ratkeville, Bahamas.
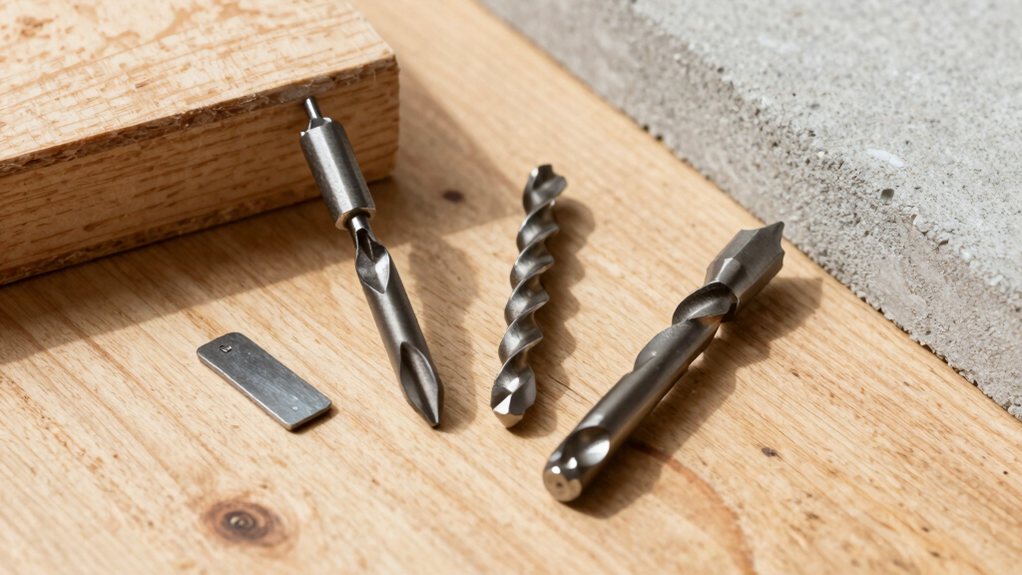
Pick the perfect drill bit for wood, metal, or masonry to ensure your project's success and discover the one critical mistake most DIYers make.
To choose the right bit, start with your material. For wood, a brad point bit gives you the cleanest entry and exit, especially if you use a backer board. For metal, you need HSS or cobalt bits that resist heat and have split points to prevent skating. With masonry or concrete, only a carbide-tipped bit has the toughness to crush through without dulling instantly. Understanding these basics means you’re already drilling smarter.
Table of Contents
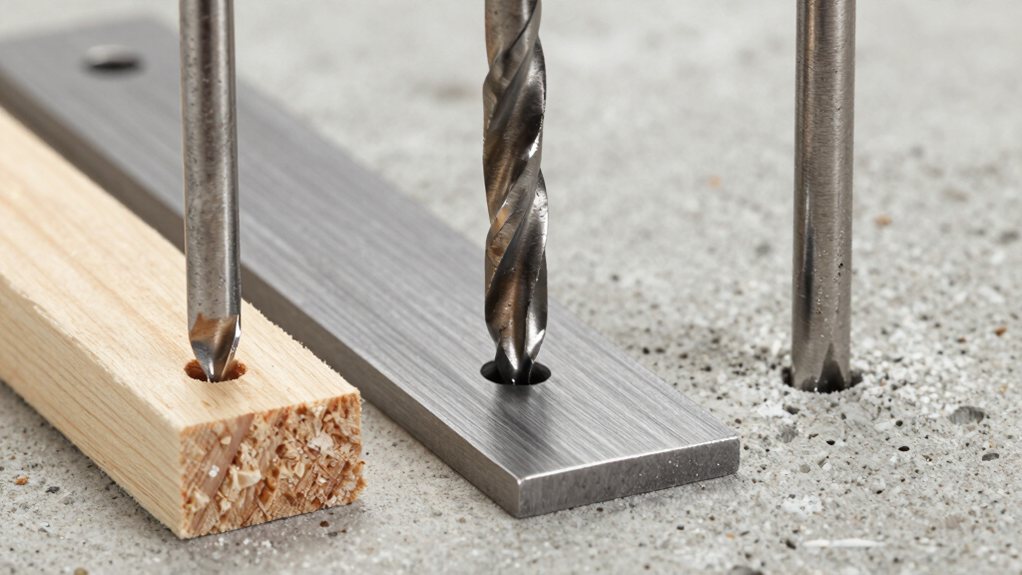
Ever stared at that wall of drill bits at the hardware store and wondered, “Which one do I actually need?” You’re not alone.
Let’s match the bit to your material. For wood, use a brad point or spade bit; they’re designed for clean entry.
Metal requires sharp twist bits, often made from cobalt. For masonry, you need a carbide-tipped bit to crush concrete.
Staying organized is half the battle. A good bit storage case saves you from frantic digging. Some sets even use color coding on the shanks—like blue for metal or gold for wood—which is a genius little cheat. Grab the right bit, and you’ll drill with confidence, not crossed fingers. Consider investing in a professional drill bit set that includes a bit storage case to keep everything organized.
So, you’re ready to tackle that woodworking project, but how do you make sure you don’t end up with splintered, ragged holes that look like they were chewed out?
For the cleanest results in wood, brad point bits are your best friend. Their sharp center spur and outer cutting edges slice cleanly through the fibers, minimizing tear-out.
Always consider the grain direction; drilling with the grain is easier, but you must be extra vigilant against splintering on the exit side. A simple trick is to use a sacrificial backer board clamped behind your workpiece. This supports the wood fibers as the bit breaks through, giving you a crisp, clean hole on both sides, which is a small victory worth celebrating. Consider investing in a woodworking tools professional set to ensure you have the right bits and accessories for consistent results.
When you’re ready to tackle metal, you’ll want bits that bite right in instead of skating across the surface.
Your best bets are high-speed steel bits for most jobs, or you can upgrade to tougher cobalt or even carbide-tipped types for hard alloys.
These materials stay sharp under heat, making your work much easier and saving you a lot of frustration.
For best results, consider using bits recommended for a professional cordless drill set to ensure compatibility and peak performance.
Here’s what makes them so reliable:
1. Built for Speed & Heat: True to their name, they can handle high drill speeds.
The alloy composition resists softening, so you can drill longer without stopping.
2. Versatile Performers: While metal is their specialty, a good set of HSS bits will also power through hardwoods and plastics without much complaint.
3. Smooth Results: They create clean holes with better surface finishes than standard bits,
meaning less burr and cleanup work for you afterward.
For heavy-duty tasks, consider a professional drill driver set that includes multiple HSS bits for convenience.
While high-speed steel bits are your trusty all-rounders, sometimes you need a tool that can truly conquer the toughest metals without skating across the surface. That’s where cobalt and carbide bits come in.
Cobalt bits are actually a high-speed steel with a special alloy composition, integrating more cobalt for incredible heat resistance. They laugh at stainless steel and other hard alloys.
Carbide-tipped bits are the real champions for masonry, but solid carbide bits are the ultimate for metal. Their extreme hardness comes from advanced manufacturing processes that fuse tungsten carbide powder. They’re pricey but will outlast anything else when drilling hardened steel. Just remember, these bits are brittle, so use a steady hand and avoid side pressure.
For many cordless drills, a two-speed gearbox pairs low RPM/high torque and high RPM/lower torque for optimal performance.
Concrete and masonry might seem impossibly tough, but you’ve got a secret weapon: the right drill bit makes all the difference.
You need bits with a super-hard tip to crush through the aggregate without instantly wearing down.
For this, masonry bits are your go-to.
They typically have a carbide tip brazed onto a steel body and use a fluted design to clear debris.
Here’s a quick guide to using them effectively:
For heavy-duty work, consider investing in professional power tool sets to ensure compatibility and durability.
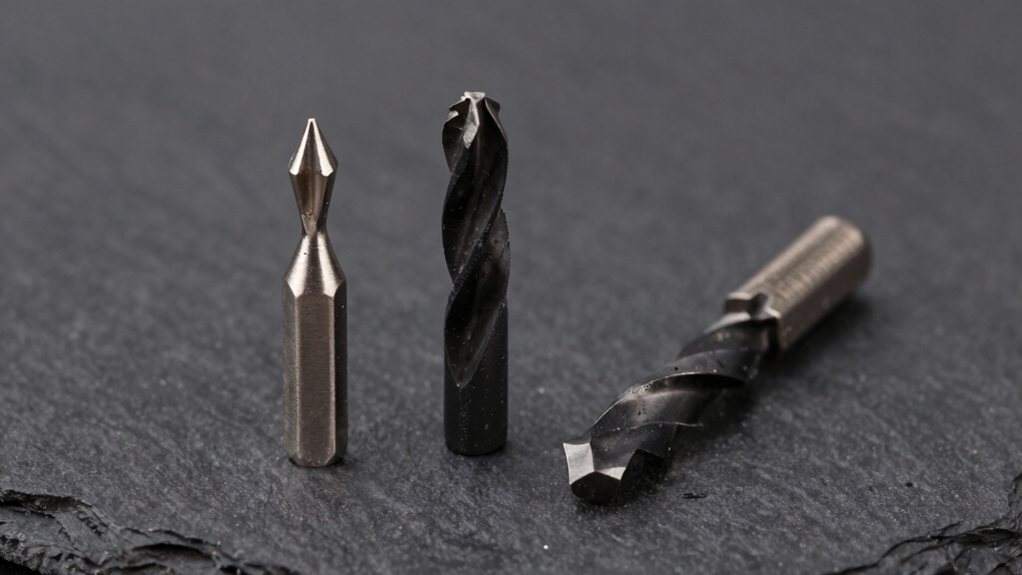
To understand why drill bits look so different, you’ll want to notice their three key parts.
The cutting edges are made from specific materials for the job, the tip’s shape determines what it’s for, and the flutes are designed to whisk away debris.
Once you see how these features work together, choosing the right bit becomes much less confusing.
Many projects benefit from using power tools designed specifically for home renovation.
1. For Wood: Bits have a sharp, centered spur and wide flutes.
This edge microstructure is like a tiny chisel, slicing through grain without splintering.
2. For Metal: A tougher, sharper point with a 135-degree split tip is key.
Special titanium or cobalt coatings combat heat and friction.
3. For Masonry: A blunt, carbide-tipped edge hammers and crushes.
The hard coating compatibility with concrete prevents instant dulling.
Many users pair bits with a professional cordless tool set for portability and power.
Now that you’ve seen how the material a bit cuts shapes its very edge, let’s look at the overall shape of the tip itself—its geometry.
This isn’t just about looks; it’s about purpose. A standard twist bit has a sharp, centered point that helps it start accurately in wood or metal.
Spade bits, with their flat, paddle-like tip, bore large holes quickly but roughly.
The real cleverness is in specialty designs, like the brad point. Its sharp spurs score wood fibers cleanly, preventing splintering.
This design evolution is fascinating, often protected by a rich patent history.
Each tip shape solves a specific problem, turning a simple tool into a precision instrument for your project. For projects that demand precision, consider investing in a professional woodworking tools set designed for accuracy and durability.
While the tip of a bit does the cutting, you’ve got to get all those little chips out of the hole, which is exactly where the flutes come in—they’re the spiral grooves running up the bit’s body.
They act like a tiny screw conveyor, grabbing debris and pulling it up and out as you drill.
A clean hole is a happy, efficient hole, preventing overheating and jamming.
Here’s a quick look at how flutes do their job:
Many shops rely on professional woodworking router set for precise edge and groove work.
You might think your drill bits are destined to become dull and useless, but with a few simple habits, you can actually keep them cutting sharp for a surprisingly long time.
First, think about corrosion prevention. Always wipe your bits clean after use, as moisture from wood or metal shavings can cause rust. A quick pass with an oily rag adds a protective layer.
Next, invest in proper storage solutions. Don’t just toss them loosely in a toolbox where they bang together and dull each other. A simple bit organizer or a labeled case keeps them separated and easy to find.
Finally, match the bit to the material and use the correct speed; forcing a bit through metal with a wood setting is a sure way to ruin its edge.
So there you have it, your quick guide to matching the bit to the job. Remember, using the right bit isn’t just about a cleaner hole, it’s about keeping your bits sharp and your projects frustration-free. Take care of them, and they’ll return the favor for years. Now you’re ready to tackle that next DIY task with a bit more confidence, and hopefully, a lot less guesswork. Happy drilling